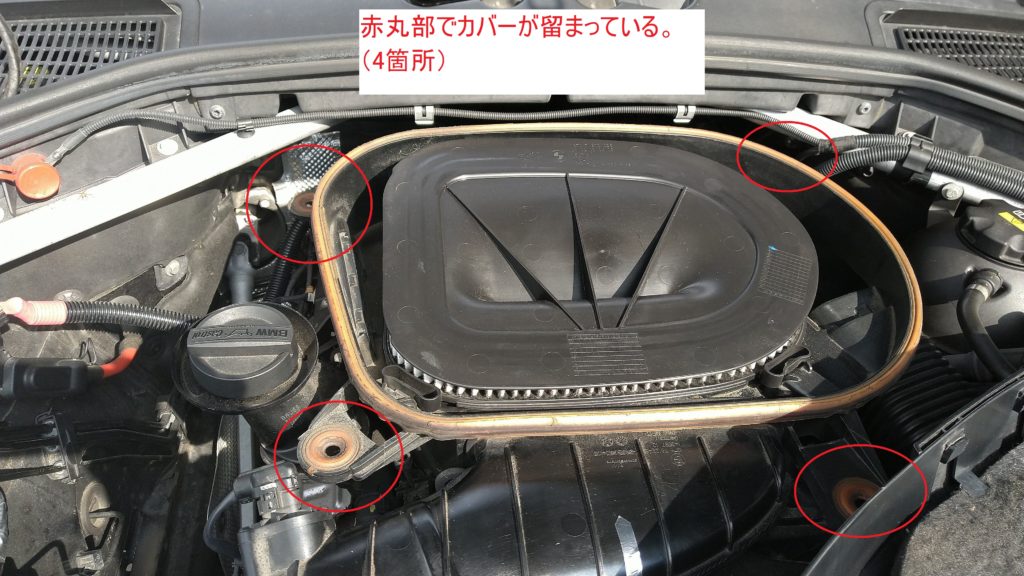
Here’s the full photo record of my BMW X3 (F25) Android screen installation — fitting a 12.3-inch unit in place of the factory monitor.
I covered what these Android screens are, and how I chose mine, in earlier posts:
- Retrofitting a 12.3-Inch Android Screen to My 300,000 km BMW X3 (F25)
- Choosing a 12.3-Inch Android Screen for the BMW X3 (F25) on AliExpress
This time: the F25 Android screen installation itself, start to finish.
If you’re comfortable swapping a car stereo, the difficulty level here is nothing extreme.
Tools You’ll Need
Not much, actually. Here’s what I used.
Trim Removal Tools
The Android screen came with a free plastic pry tool, but it was so flimsy and poorly molded that I used my own instead.
A proper set of trim removal tools is endlessly useful — door panels, wiring jobs, you name it. Worth owning a good one.
Cheap, decent sets are easy to find (affiliate link): car trim removal tool kits on AliExpress

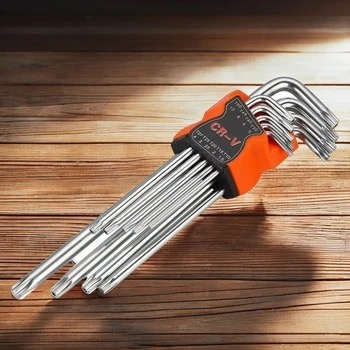
Torx Wrench Set
For whatever reason, BMW secures the head unit and monitor with star-shaped Torx screws.
I only had a cheap hardware-store set, and it did the job fine — no stripped screws.
Two different screw sizes are used, so any multi-piece set should cover you (affiliate link): Torx key wrench sets on AliExpress
Pliers
Only used to break the L-shaped Torx keys loose on the initial turn.
If your fingers are strong, maybe you won’t need them.
The Android Screen, Delivered
Mine came from AliExpress after much deliberation — about ¥45,000 (approx. US$400 at the time) including shipping.
There were so many options that I honestly couldn’t tell which was “best”, so I went cheap enough that a failure wouldn’t hurt too much. Full details in the buying-guide post.
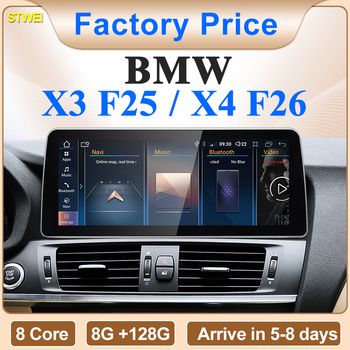
The exact listing I ordered from is gone now, but current equivalents are here: 12.3″ Android screens for BMW X3 F25 / X4 F26 on AliExpress
Here’s a current listing for the same type of 12.3-inch unit (affiliate link):
Here’s the unboxing:
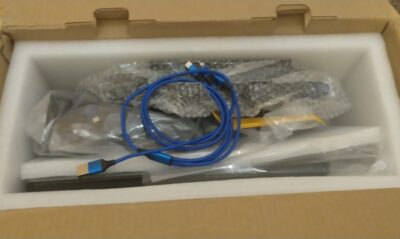
Well padded — but not a single page of instructions inside
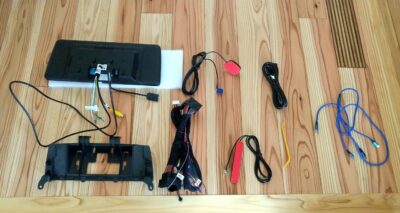
The freebie yellow pry tool had such rough, ugly molding on the tip that I never considered using it.
The parts themselves looked fine. Buying from overseas, I’d braced myself for a defective unit, so no visible damage was a relief.
Removing the Factory Head Unit
Time to tear into the F25’s audio section.
For the disassembly and installation procedure, I found overseas YouTube videos showing this exact job, and watched them several times beforehand. Highly recommended homework.
First, use a trim tool to pop off the black panel below the climate control panel.
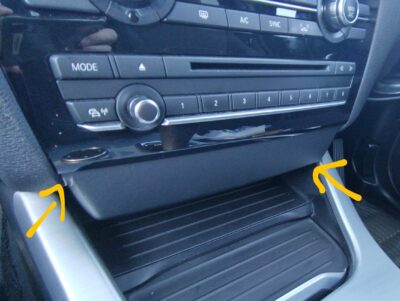
Slip the trim tool into the gap — it’s only held by clips and comes off easily
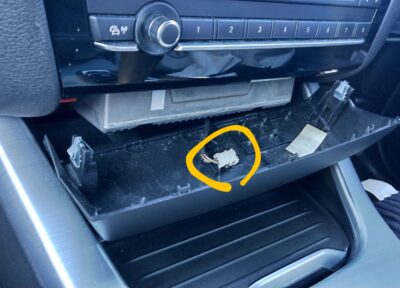
Behind it is a connector for the small LED that lights the storage tray (yellow circle) — unplug it
A note on the connectors throughout this job: they’re stiff. Think about where to apply force before pulling, or you’ll break something.
Next, remove the upper trim panel. Again, just clips — the trim tool handles it.
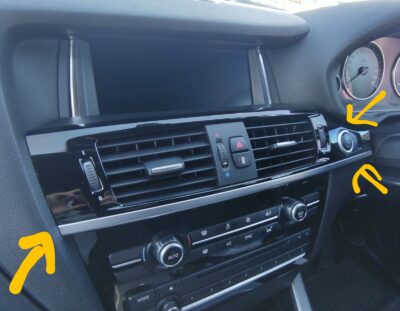
Work the tool in around the yellow circle and it pops toward you
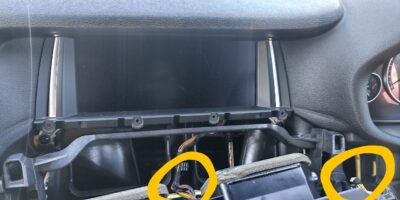
The right connector (cut off in this photo) feeds the engine start switch; the center one feeds the hazard switch cluster
The start switch connector came off easily, but the hazard switch connector put up a real fight.
It takes a certain amount of brute force, and your fingers will hate you. Once you’ve done it you’ll know the trick — and promptly forget it by next time.
Removing the Climate Control Panel
Next comes the climate/audio control panel. This is where the Torx wrenches come in.
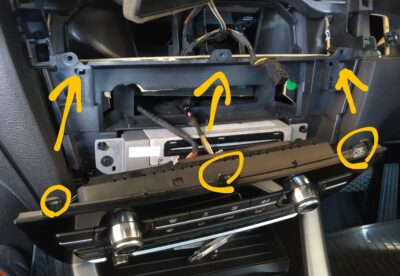
Torx screws at the top and bottom hold it in place. With the right tool, this part is easy.
With the screws out, disconnect the connectors on the back of the climate panel.
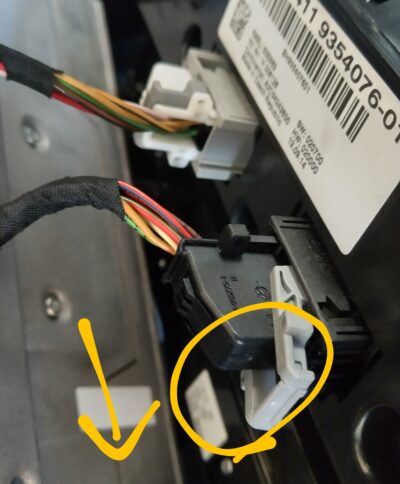
I’d never seen this locking mechanism before and couldn’t figure it out at first. The photo shows it unlocked: flip the gray lock lever (yellow circle) toward you and the connector slides right out.
Clever design, actually. Maybe all modern cars are like this now?
There are two of these connectors — remove both the same way.
With the climate panel out, the factory head unit is exposed.
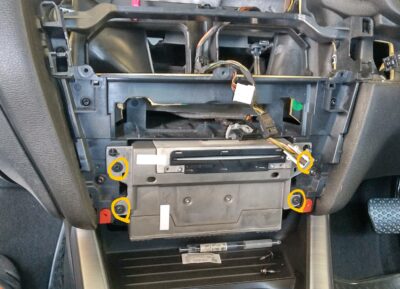
Four Torx screws (yellow circles) hold the unit — remove them and it slides out
Removing the Factory Monitor
Next, out comes the factory monitor.
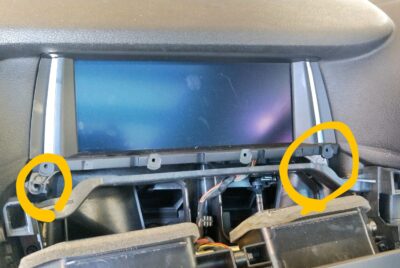
The monitor is held by two Torx screws at the lower left and right
The top edge just hooks in place, so tilt the top back and lift the bottom toward you.
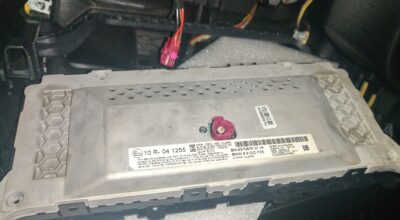
Just one pinkish connector on the back
That’s the NBT monitor connector — a single cable carrying both power and video.
The new Android screen has far more cables on its back, so the extra signals have to be tapped from the head unit’s harness.
Splicing Into the Head Unit Wiring
The good news: the tap harness is included, and it’s all plug-and-play couplers. No cutting or crimping needed.
Since it’s coupler-on, you could return the car to bone stock without a trace.
First, remove the factory connector from the back of the head unit.
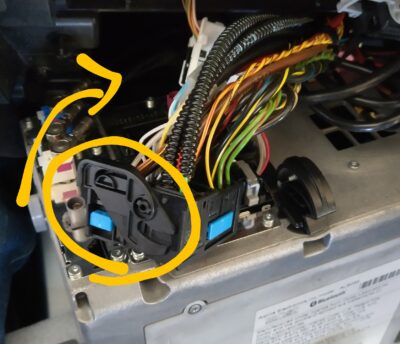
Lift the black arm and the whole connector releases; reverse the motion to seat it firmly on reassembly
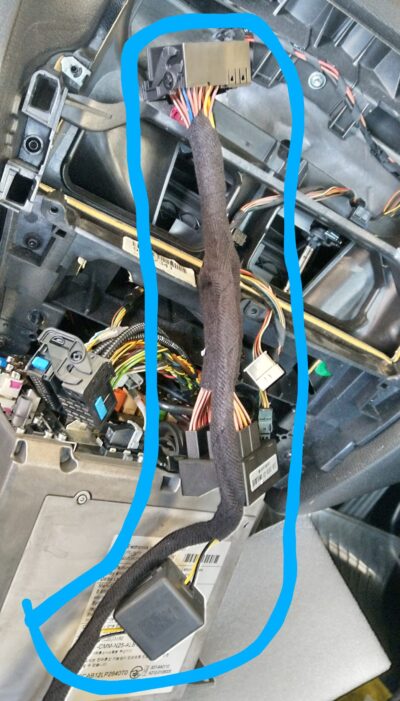
The splice harness (blue outline) sits between the factory connector and the head unit
This harness plugs into the back of the head unit, and everything goes back where it was.
It’s a thick bundle with bulky couplers, and I was worried it wouldn’t fit behind the unit.
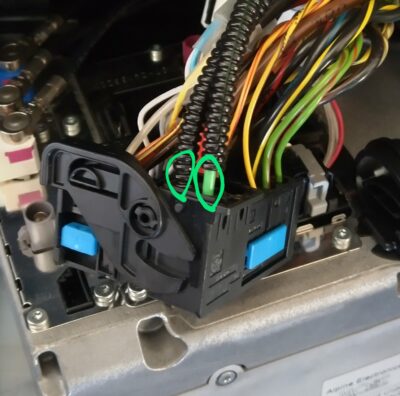
Mostly plug-and-play — but the two leads in the green circles must be moved over individually
Those two are fiber-optic lines, which can’t be split — that’s why they get repinned instead.
Pull the factory connector off the head unit, extract those two fiber leads from it, insert them into the splice harness’s connector, and plug everything back into the head unit.
This is hard to describe in words — a YouTube video of an X3 Android screen install will make it click instantly.
With the splice harness in place, route the cables up to the monitor position.
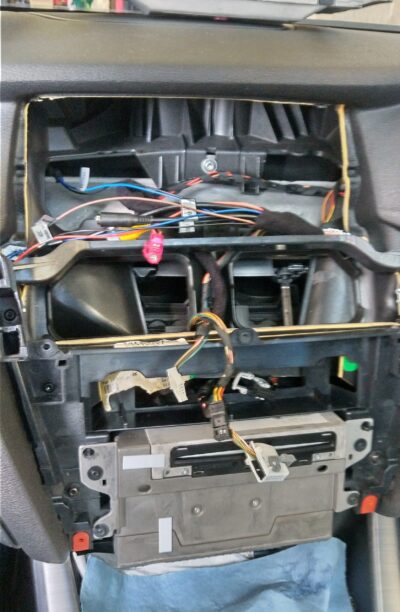
Route the cables from behind the head unit, through the center vent area, up to the monitor (apologies for the blur)
In this photo the head unit is already back in — and getting it back in with the extra harness behind it was a struggle.
I stuffed the spliced couplers and cables as far into the lower-right recess as they’d go, and it finally seated.
I’ve installed stereos in cars with far less space to work with, so the F25 is comparatively forgiving.
Fitting the GPS Antenna
The Android screen can run map apps and work as a standalone navigation unit.
A GPS antenna was included, so I stuck it in an empty spot deep inside the dash.
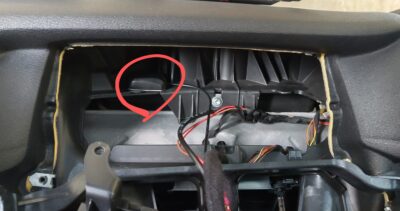
Routing it all the way onto the dashboard felt like a hassle, so I hoped this hidden spot (red circle) would get adequate reception.
Well… after some real-world use, reception there wasn’t good enough — the position fix drifts now and then. I’ll need to relocate the antenna at some point.
Mounting the Screen
Finally, the main event.
First, fit the included mounting base into the space where the factory monitor was.
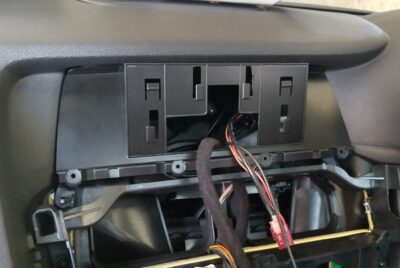
It went in eventually — but it fought like a puzzle box and took a while
The base has a cable hole in the center, so you can still adjust cable routing after it’s mounted.
Screw the base down at the lower left and right, then mount the 12.3-inch screen itself.
The only cables I connected to the screen were the GPS antenna and the splice harness from the head unit. Most of the others went unused.
There were external-input leads and more, but I can’t see myself needing them anytime soon.
Unused cables get pushed back through the base’s center hole.
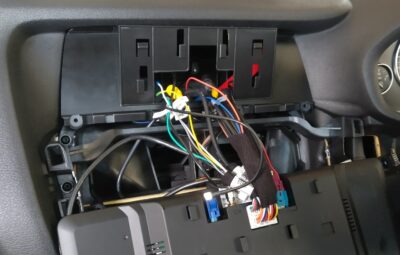
Going the other way, three leads come from the screen and need to end up somewhere reachable: two USB ports and one SIM card slot.
I routed one USB behind the head unit and left the rest tucked below the climate panel for now.
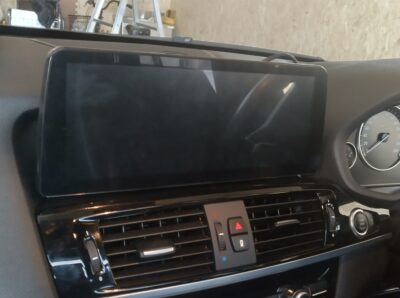
Done! You can just spot the USB lead peeking out behind the screen
Wrapping Up the F25 Android Screen Installation
And with that, the Android screen was up and running.
Total working time: about 3 hours. With experience, I’d say 2 hours is realistic.
There was almost no information about this swap in Japanese, so I pieced the job together from overseas sites and videos — and it worked out.
The result: a massively bigger screen, and I couldn’t be happier.
At roughly ¥45,000 (approx. US$400 at the time) for a big screen plus full Android app support, the cost-performance is absurd.
For F-series and E-series BMWs — where the factory navigation is clunky and the maps are ancient — I think this is one of the best-value upgrades you can make.
My F25 X3 was closing in on 320,000 km at the time, but with the navigation modernized, it felt ready for plenty more.
If you attempt this installation based on this article, you do so at your own risk!
This article is also available in Japanese.